> ## Documentation Index
> Fetch the complete documentation index at: https://docs.alignr.io/llms.txt
> Use this file to discover all available pages before exploring further.
# Take a visual tour
> See the real setup wizard, client checks, assistant and report screens before you start.
Use this tour to recognise the screens in the step-by-step guides. These are captures of Alignr running locally on 26 September 2026 with seeded demonstration data. The examples show an environment that still needs configuration and assessment; they are not live customer results.
## The short screen tour
This silent, 18-second tour moves between four screenshots; it does not demonstrate completed authorisation or an AI response. The sections below provide the same information in text and full-size images.
* **0–5 seconds:** Microsoft setup. Prepare partner access, then choose the workspace connection method and account.
* **5–9 seconds:** Tool setup. Choose Datto RMM, Autotask or HaloPSA; RMM and PSA are different sources.
* **9–13 seconds:** Standards. Build a guided baseline or import a checklist, then review it before activation.
* **13–18 seconds:** Ask Alignr. Check the client and page scope before sending a question.
## 1. Choose your Microsoft access path
* **Left:** choose a setup step. You can return to unfinished steps.
* **Centre:** prepare partner access, then select the workspace's default connection method and account.
* **Top right:** **Finish later** returns to the app; it does not establish that setup is complete.
For a client outside Partner Center, use a Direct connection. Follow the [Microsoft setup walkthrough](/integrations/microsoft-setup) for prerequisites, permissions and verification, or [the wizard guide](/guides/setup-wizard) for all four steps.
## 2. Connect your tools and choose expectations
Select the intended product and follow its prerequisites. Saving credentials, mapping source clients and collecting evidence are separate checkpoints. Browse the [integration catalogue](/guides/integration-catalogue) for the broader choice of tools.
Review the contents and scope before enabling a standard. A global standard is not isolated to a pilot client merely because you run checks for that client. See [Build or import a standard](/guides/build-or-import-standard).
## 3. Read the client's checks
Start with the client name, then read the status, evidence and last-checked information together. Open a check to investigate it. **Needs evidence** is an instruction to investigate the evidence path, not a lower-severity pass.
Follow [Your first assessment](/journeys/first-assessment) to move from this screen to a result you can explain. Use [troubleshooting](/guides/troubleshooting) when collection or evaluation is incomplete.
## 4. Ask for help in context
Check the scope chips before sending a question. Choose a suggestion or describe the result you need explained. A configuration proposal must be reviewed before applying; this screenshot shows the starting panel, not a generated answer or saved change.
[Use the AI assistant](/guides/ask-alignr) includes prompt examples and the supported draft operations.
## 5. Prepare the client discussion
Inspect the client's evidence and outstanding work before preparing a report. Check the saved output before sharing it. Later assessments do not rewrite an earlier snapshot.
Continue with [Prepare a client report](/guides/client-reports) and [Run a client meeting](/journeys/client-meeting).
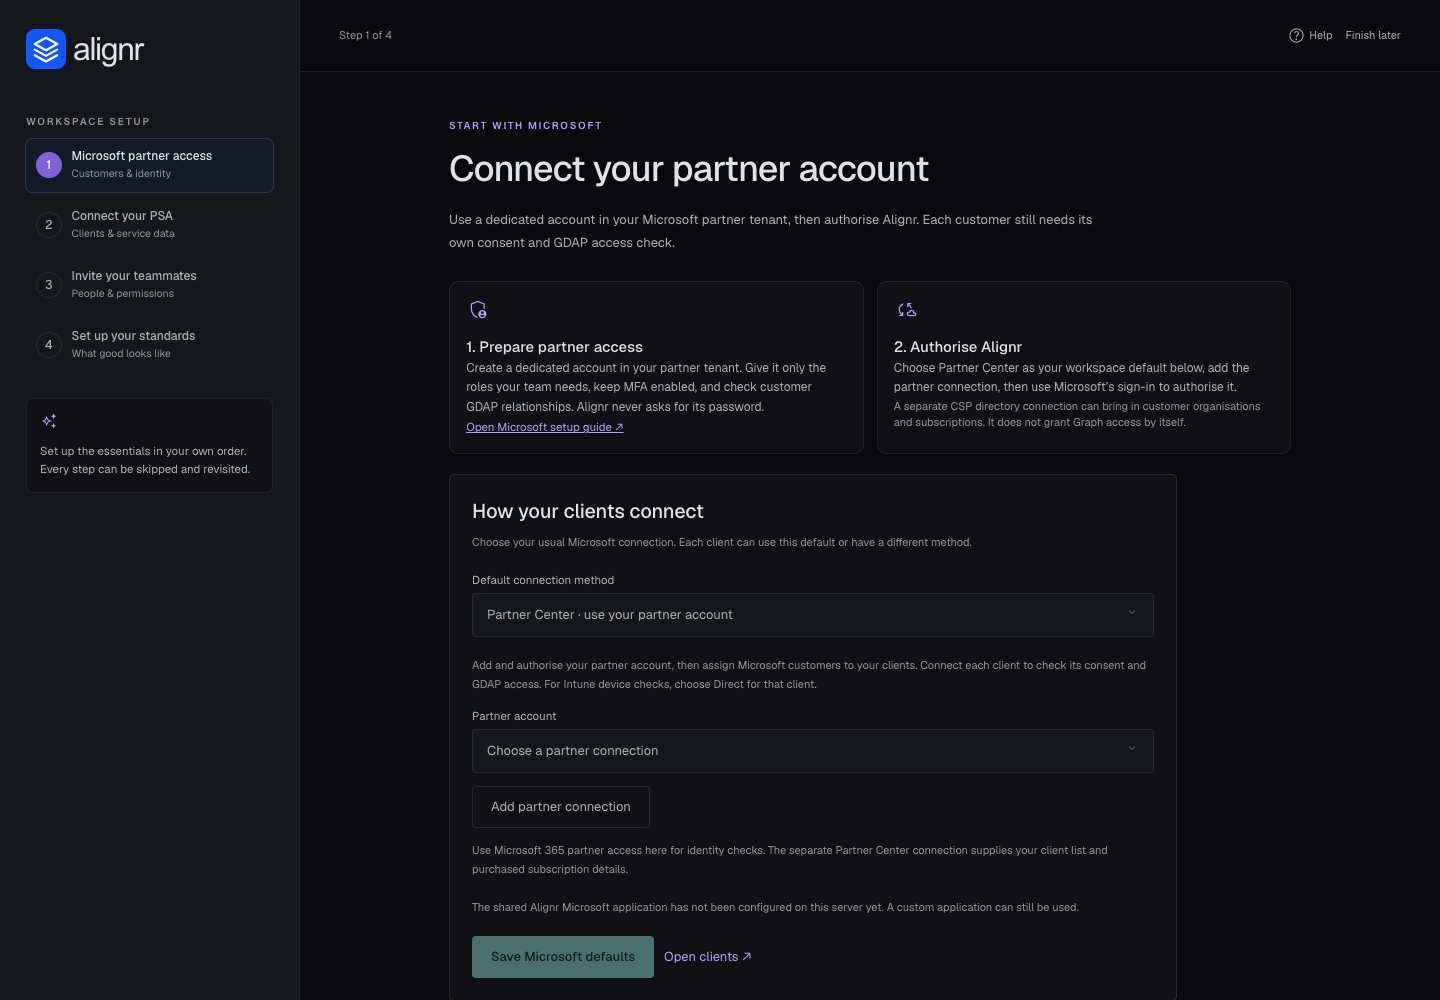 * **Left:** choose a setup step. You can return to unfinished steps.
* **Centre:** prepare partner access, then select the workspace's default connection method and account.
* **Top right:** **Finish later** returns to the app; it does not establish that setup is complete.
For a client outside Partner Center, use a Direct connection. Follow the [Microsoft setup walkthrough](/integrations/microsoft-setup) for prerequisites, permissions and verification, or [the wizard guide](/guides/setup-wizard) for all four steps.
## 2. Connect your tools and choose expectations
* **Left:** choose a setup step. You can return to unfinished steps.
* **Centre:** prepare partner access, then select the workspace's default connection method and account.
* **Top right:** **Finish later** returns to the app; it does not establish that setup is complete.
For a client outside Partner Center, use a Direct connection. Follow the [Microsoft setup walkthrough](/integrations/microsoft-setup) for prerequisites, permissions and verification, or [the wizard guide](/guides/setup-wizard) for all four steps.
## 2. Connect your tools and choose expectations
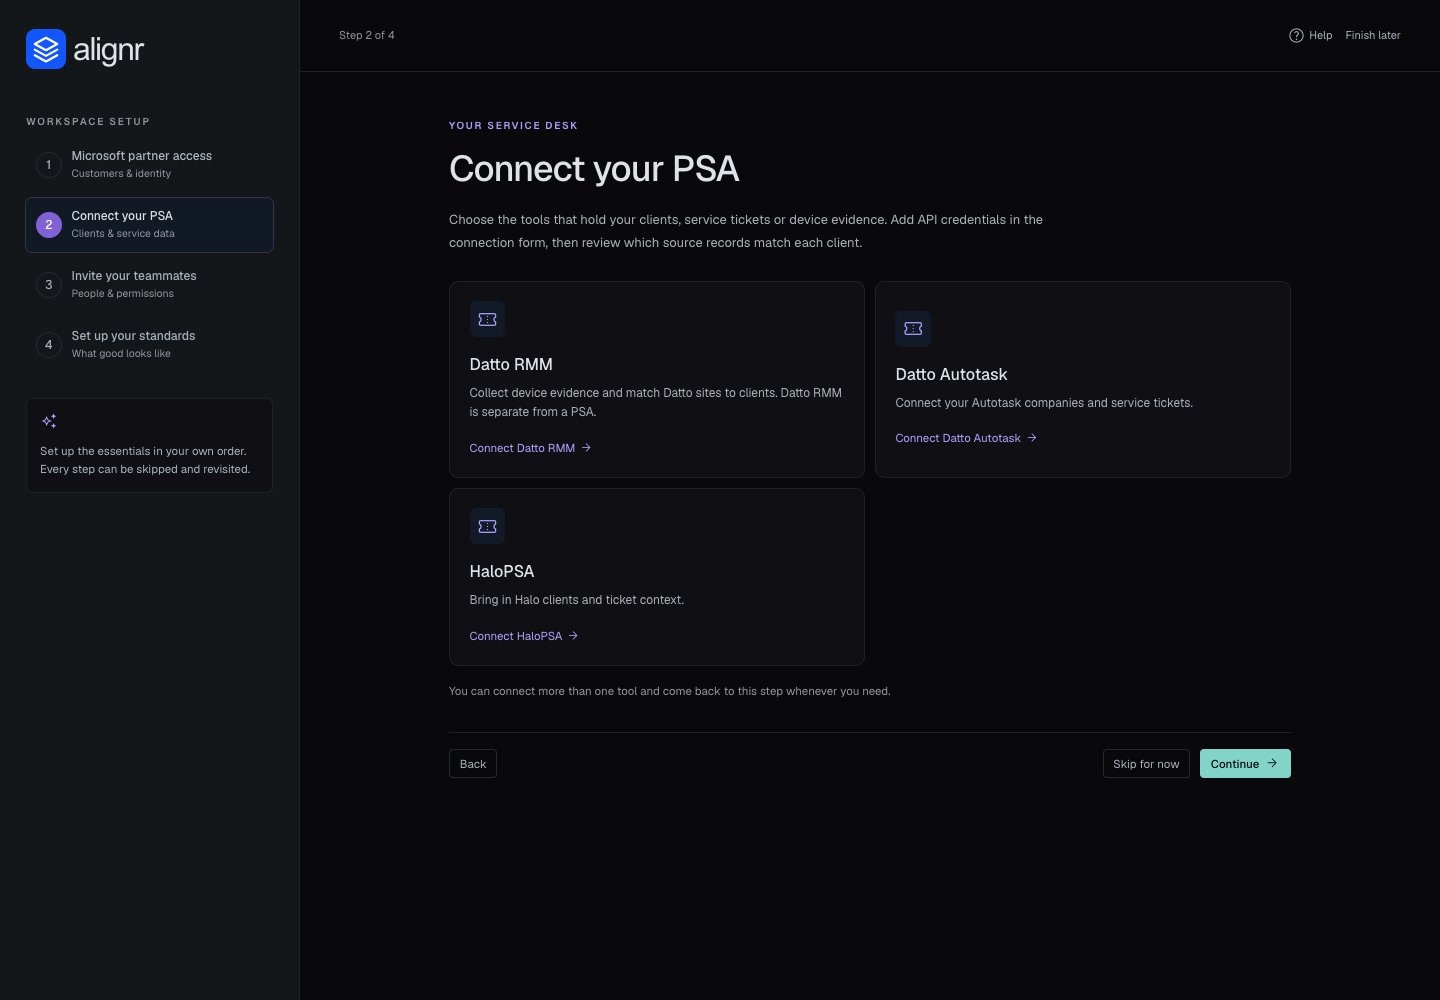 Select the intended product and follow its prerequisites. Saving credentials, mapping source clients and collecting evidence are separate checkpoints. Browse the [integration catalogue](/guides/integration-catalogue) for the broader choice of tools.
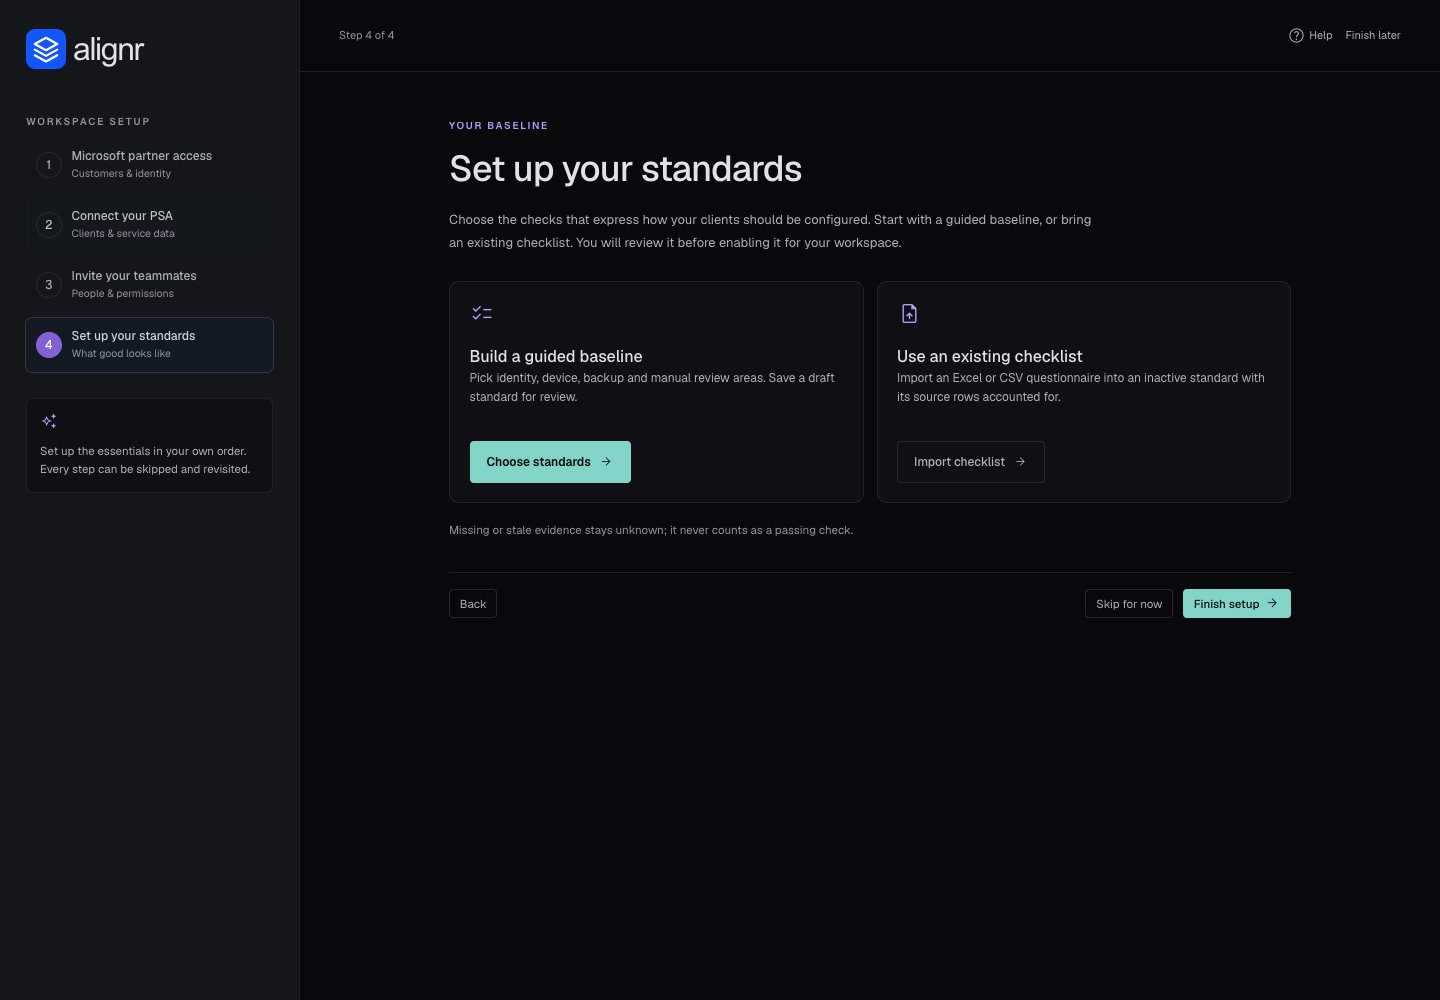 Review the contents and scope before enabling a standard. A global standard is not isolated to a pilot client merely because you run checks for that client. See [Build or import a standard](/guides/build-or-import-standard).
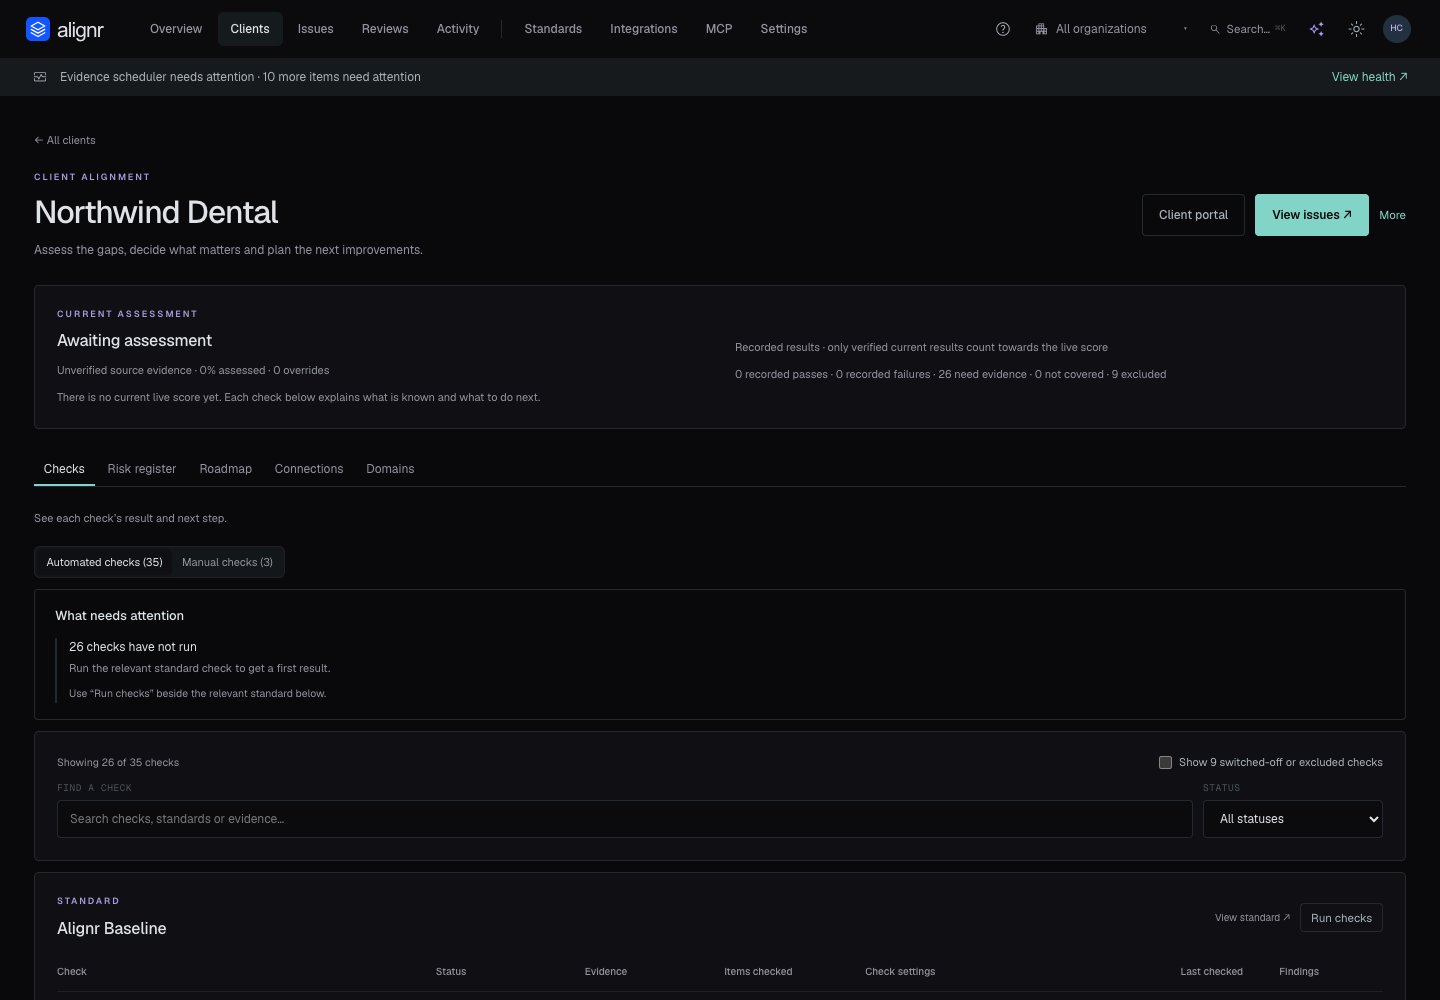 Start with the client name, then read the status, evidence and last-checked information together. Open a check to investigate it. **Needs evidence** is an instruction to investigate the evidence path, not a lower-severity pass.
Follow [Your first assessment](/journeys/first-assessment) to move from this screen to a result you can explain. Use [troubleshooting](/guides/troubleshooting) when collection or evaluation is incomplete.
## 4. Ask for help in context
Start with the client name, then read the status, evidence and last-checked information together. Open a check to investigate it. **Needs evidence** is an instruction to investigate the evidence path, not a lower-severity pass.
Follow [Your first assessment](/journeys/first-assessment) to move from this screen to a result you can explain. Use [troubleshooting](/guides/troubleshooting) when collection or evaluation is incomplete.
## 4. Ask for help in context
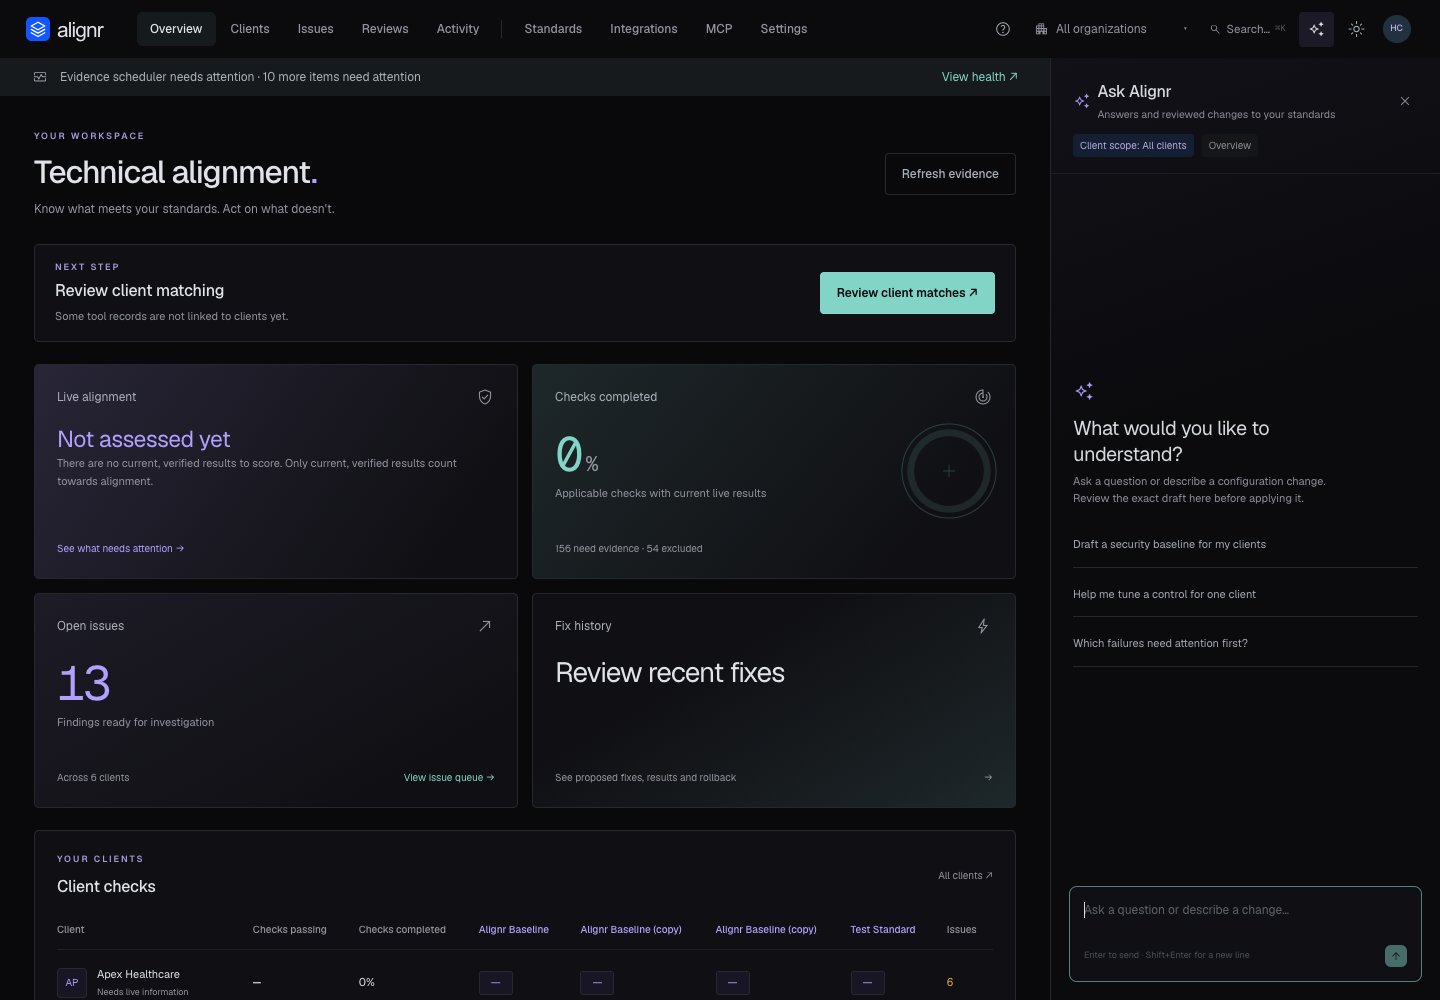 Check the scope chips before sending a question. Choose a suggestion or describe the result you need explained. A configuration proposal must be reviewed before applying; this screenshot shows the starting panel, not a generated answer or saved change.
[Use the AI assistant](/guides/ask-alignr) includes prompt examples and the supported draft operations.
## 5. Prepare the client discussion
Check the scope chips before sending a question. Choose a suggestion or describe the result you need explained. A configuration proposal must be reviewed before applying; this screenshot shows the starting panel, not a generated answer or saved change.
[Use the AI assistant](/guides/ask-alignr) includes prompt examples and the supported draft operations.
## 5. Prepare the client discussion
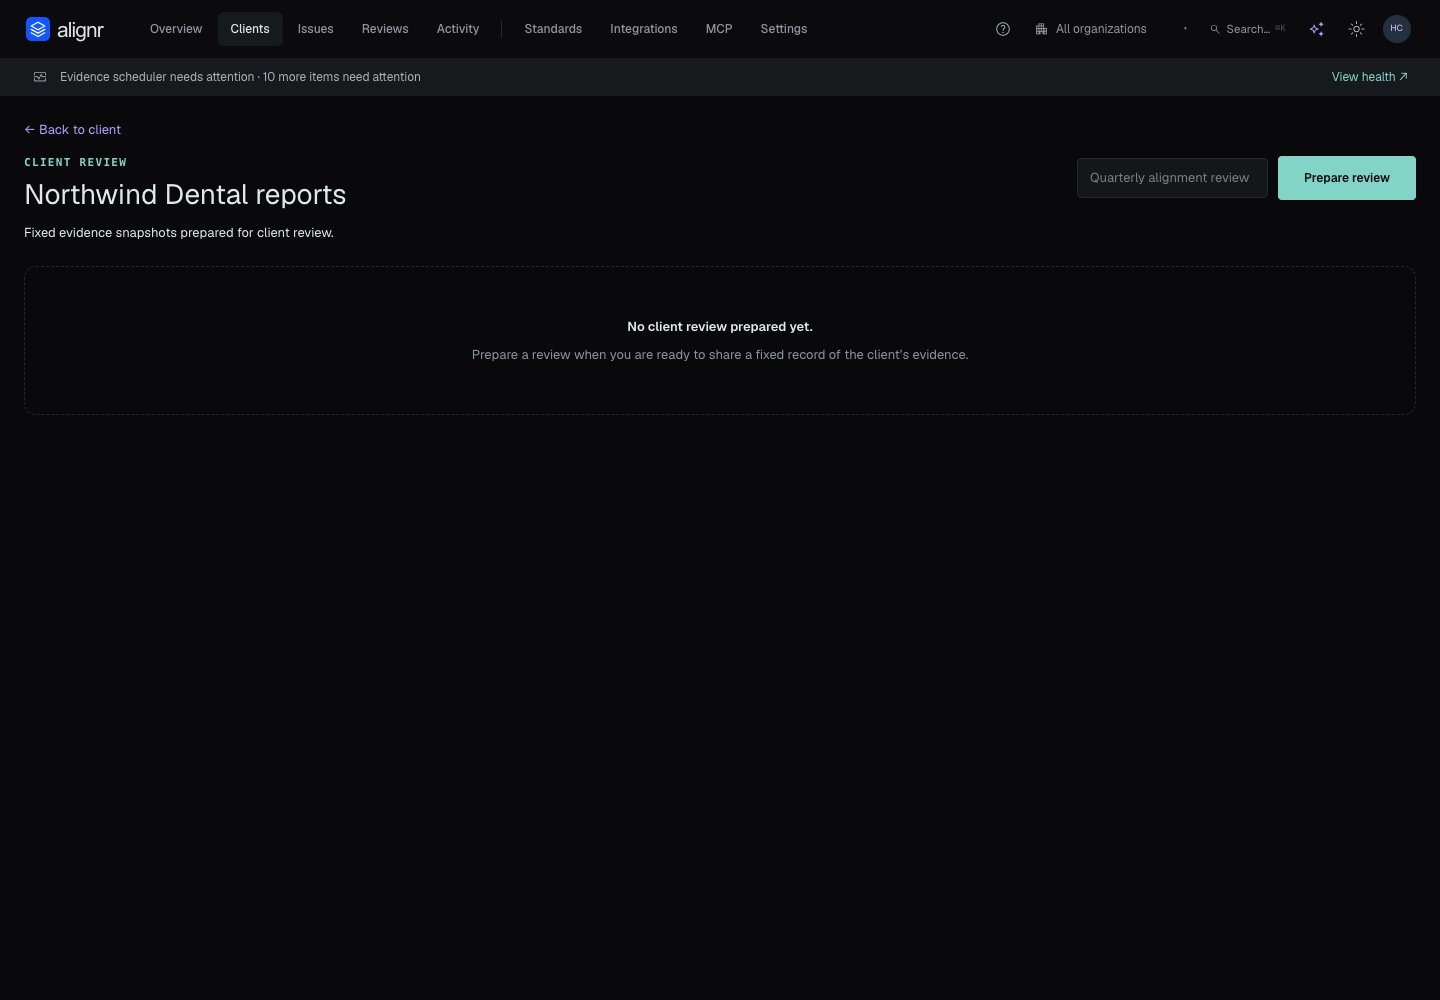 Inspect the client's evidence and outstanding work before preparing a report. Check the saved output before sharing it. Later assessments do not rewrite an earlier snapshot.
Continue with [Prepare a client report](/guides/client-reports) and [Run a client meeting](/journeys/client-meeting).
Inspect the client's evidence and outstanding work before preparing a report. Check the saved output before sharing it. Later assessments do not rewrite an earlier snapshot.
Continue with [Prepare a client report](/guides/client-reports) and [Run a client meeting](/journeys/client-meeting).